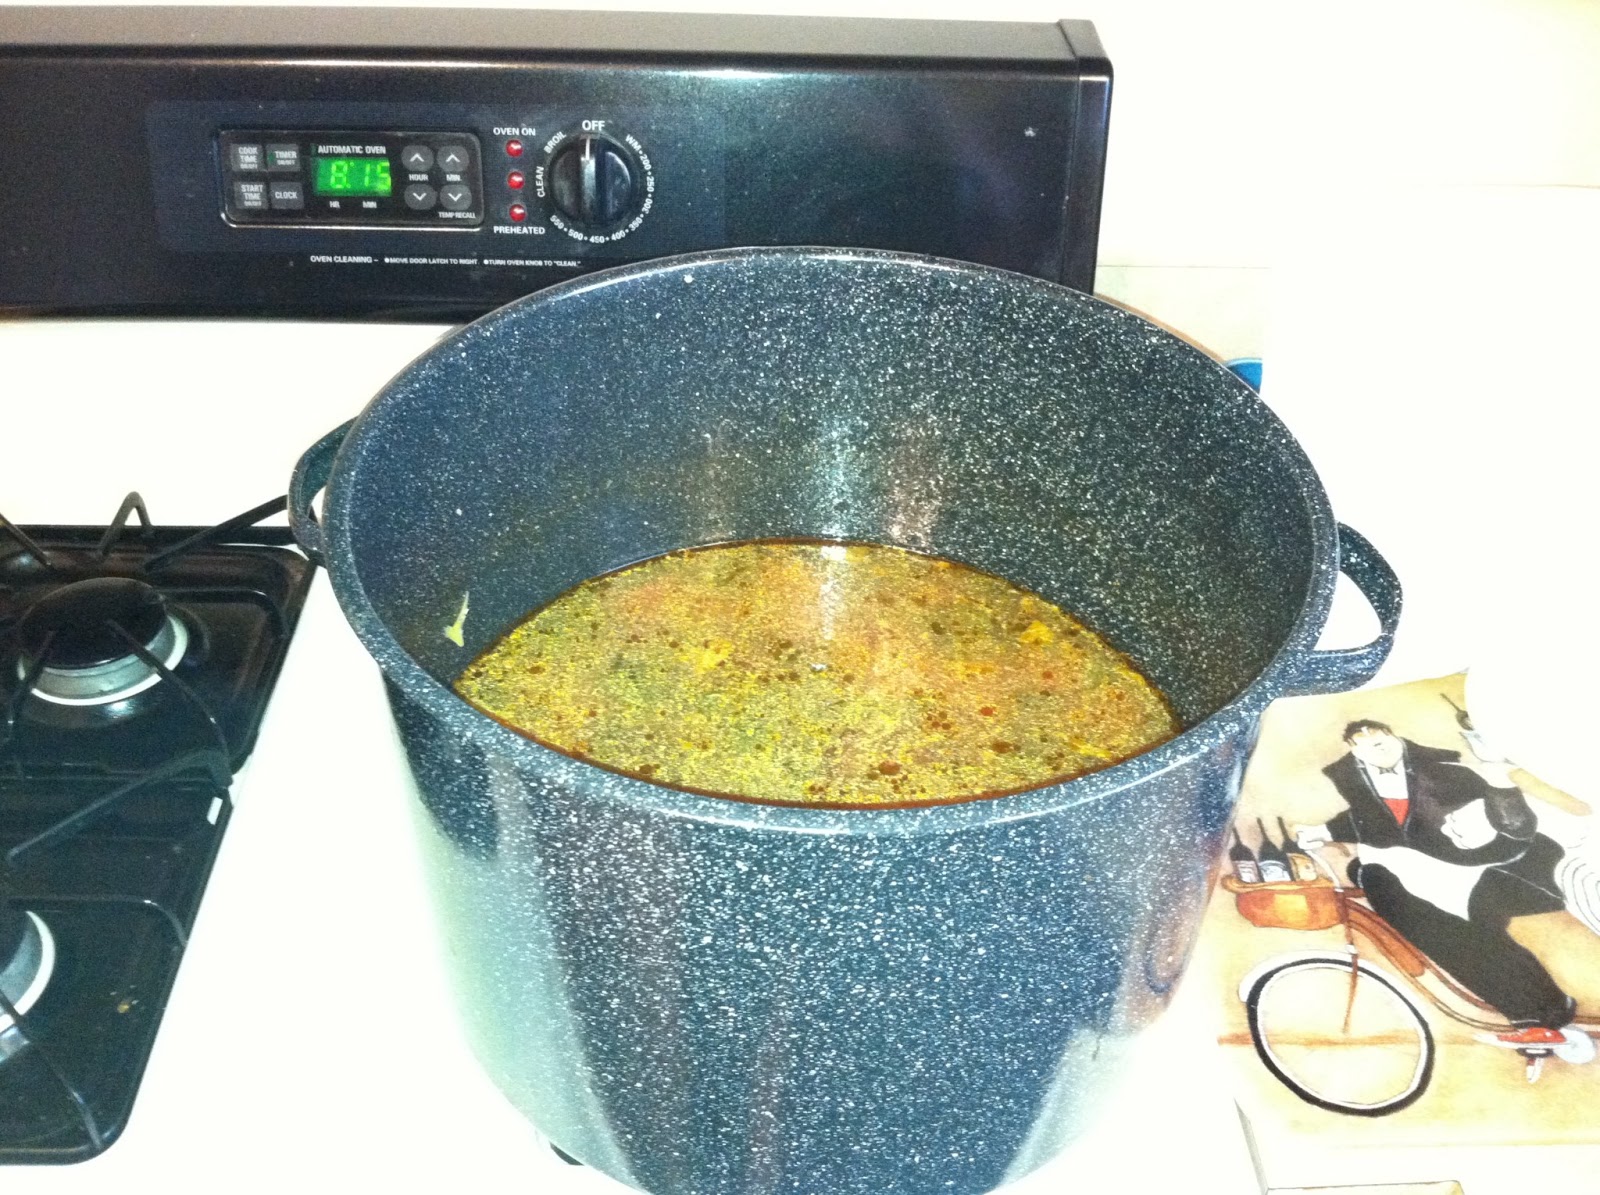
I got a text from my hubby before I got out of work yesterday that said he was making Paleo Friendly soup for dinner. I thought, that is great, now I don't have to cook. When I got home, I found this vat o'soup sitting on the stove. It was good, but even after packing lunches, there was just too much to eat before it would be bad. So I decided to pull a trick out of my hat and get the pressure canner out and can some soup.
Even before I decided to change my lifestyle to Paleo, I loved to can food. I like the idea that I can control what is in what you are eating and that there is nothing added that shouldn't be in there (in the past few years, I have tried to eliminate things like preservatives from my diet).
If you have never canned before, it is easiest to start out with jams and jellies to get the hang of it. It has been at least 5 years since I have bought a jar of jam, and the stuff you get in the store is loaded with preservatives and tastes awful compared to what you can make yourself. After jam and jelly, I moved on to apple and cranberry sauce canning. If you don't want to eat the jam and jelly because they contain lots of white refined sugar, that is understandable, but your non-paleo friends and family will love it as gifts. I actually have people fight over the last jars of my applesauce (which is what I would consider paleo because it is apples, water and a little bit of spices). Canning high-acidic food (fruit/jam/jelly/tomatoes) is very easy because you use a hot water bath to preserve the food.
To can low-acidic foods (meats and vegetables) you need to get the jars hotter than boiling water, and you have to use steam in a pressure cooker. Once you get the hang of canning, it is very easy to do. I like it because you can have shelf-stable food in your pantry for when you have a hunger attack and no time to make dinner (or at your desk when there the weather is bad and you don't want to go out).
If you want to know more about canning, get the book above (it is my canning bible) and then also visit the
Ball Canning Website. I would say that the recipes are not necessarily paleo, but the book definitely goes over some cooking basics like making beef and chicken stock that you can use in other recipes or preserve for later use.
These are some of the tools you need for canning:
In the back I have a pan with hot water and the jar lids (I call them flats). The flats need to be in hot water, but not boiling water. The hot water activates the rubber around the flats so you get a good seal on the jar. You can only use the flats once, so I usually write the contents of the jar on them with a sharpie once the jars have cooled.
23 quart pressure cooker/canner (left) and vat of paleo soup (right)
Tools, from the top: lid rings (in the container), long spoon, long ladle, jar lifter, magnet stick, jar funnel, and tongs (I use the tongs if there is an awkward position with the jars that need adjusting, and I used the tongs to get the flats out of the pan before I had the magnet stick).
When you preserve food, you need hot jars, hot food and hot water in the bottom of the pressure canner while you load it. This helps the food resist bacteria and prevents weakening and cracking of your jars from a temperature change. Take your funnel, and fill your jar. Leave room at the top of the jar for head space. The canning book will tell you how much head space that you need. Similar soup in the book required 1" head space. If you do not leave enough head space, your jars can break during processing.
Once the soup is in the jar, wipe the rim (mouth) with a wet washcloth to remove any food.
Once you have wiped the rim of the jar, then you can pick up a flat with the magnet stick.
Place the lid on the jar, centering it with your fingers, and then screw the band down tight.
Then you load your jars into the pressure canner. The canner I have will hold 8 pint (16 oz.) jars with seven around the outside, and the last one in the middle.
Once you get everything loaded and everything is secure, it is time to start canning. For similar soups, the ball canning book said to process at 10 lbs of pressure for at least 1 hour and 15 minutes.
Ok, so what am I going to do for the almost 2 hours it takes the canner to get to pressure and then let it process? Think, think, think... I know! lets get pale-organized!
I cleaned out my pantry, and I have about 1/4 of the food left that was in it (I'm just beginning this paleo lifestyle and have lots of reminders of my old lifestyle). I also found a couple of items that I could re-purpose. My old flour canister became a great storage container for my measuring cups and spoons that I use when I'm baking, and the size is perfect for me to put a jar of coconut oil in to run hot water over it and melt it. Old cereal containers became storage for the collection of paleo 'flour' that I'm gathering.
Now back to our regularly scheduled program.
Once your soup has processed, and the canner has de-pressurized, you need to take the jars out and set them on a towel. You need the towel for two reasons: 1) it protects your counter from being burned, 2) if your counter is cold, and you set a hot jar on it, you could crack the jar and lose all of the work you just did.
When the jars are cooling, you can sometimes hear a metal 'ping' sound. This is a good sound, it means that you have a seal and as the contents of your jar contract, they are pulling the lid down to seal.
There is one more thing to note about pressure canning. Pressure canning cooks the food while it is being processed. You could throw a batch of soup together get it to boiling and can it and it will cook the rest of the way while it is being processed (this is why commercially canned soups have mushy contents). If I am cooking soup to eat and preserve, I will leave the veggies firm in the soup that I take out for dinner that night so my soup is not mushy later.
So you may be wondering why I called this post
Gazinta Soup.
In my family, we like soup and we like to make it, lots of it. Which is why my husband had the largest pot in the house full of soup, and said that he learned it from me. Gazinta means... what is in the fridge/cupbord/freezer 'goes-in-to' the soup. You can have beef, turkey, chicken, or beef-tomato gazinta soup. This is a soup where I don't follow a set recipe, and I have never made it the same twice.
These are the ingredients for the soup I just canned.
Ground Beef
Kale
Carrots
Celery
Onion
Stewed Tomatoes
Tomato Sauce
Green Beans (not technically paleo, but the hubby was trying)
Broccoli
Garlic
Beef Broth (we had some in the cupbord from our pre-paleo lifestyle that he wanted to use but you could just as easily use some that you made)
Salt and Pepper to taste.
When making soup (or crockpot) recipes with ground beef, you need to brown the beef first. If you don't it will get all mushy and weird.
Brown the ground beef, start adding liquids, and then add your vegetables. I know he used about 2 lbs of ground beef but that is about all I know. He likes to chop and chop and fill the biggest pot in our house with soup ingredients. If you are planning on just eating the soup, boil/simmer until the hardest vegetable can easily be speared by a fork (in this case the carrots). If you want to preserve the soup, I would leave the veggies a little firmer so they won't be mushy later.
As fruit comes in season, hopefully I will be able to come up with more paleo-friendly fruits to can naturally (not drowning in sugary syrup).